Introduction
Skay Studio Management System is a single platform where you can perform all the tasks related to your studio.
It's a web-based system allowing you access to it from anywhere at any time and a perfect solution to simplify your workflow and increase the efficiency of your company and the services provided.
Features
- Customer management
- Meeting management
- Event management
- Payment management
- Staff management
- Report management
How To Deploy
Software requirements
| Recommended Software Requirements | |
|---|---|
| Operating System | Windows or Linux |
| Web Server | Apache |
| Server-Side Language | PHP 5.5+ |
| Database Server | MySQL 5.6+ |
Steps to deploy
$config['base_url'] = 'http://localhost/';
						$db['default'] = array(

							 'dsn'	=> '',

							 'hostname' => '',

							 'username' => '',

							 'password' => '',

							 'database' => '',

							 'dbdriver' => 'mysqli',

							 'dbprefix' => '',

							 'pconnect' => FALSE,

							 'db_debug' => (ENVIRONMENT !== 'production'),

							 'cache_on' => FALSE,

							 'cachedir' => '',

							 'char_set' => 'utf8',

							 'dbcollat' => 'utf8_general_ci',

							 'swap_pre' => '',

							 'encrypt' => FALSE,

							 'compress' => FALSE,

							 'stricton' => FALSE,

							 'failover' => array(),

							 'save_queries' => TRUE

						);
'hostname' => 'localhost',
'username' => 'root',
'password' => '',
'database' => 'skayphotography',
Login
The system cannot be accessed unless the user is registered in the system. Administrator is allowed to create user accounts. Therefore, before logging in, make sure you own a user account in the system and the correct user name and the password of the account are with you.
Demo Logins
- Type in the system URL in your web browser and Enter
- Type in your user name and the password in relevant fields and click the Login button
If the input credentials are accurate, you will be redirected to the system dashboard. Otherwise, an error message will prompt stating, “Invalid user name or password”.
Logout
Logging out of the system prevents unauthorized actions in the current login session.
- Locate Settings icon at the right corner of the top bar and click on it
- Click on Sign-out command listed in the dropdown panel
Customer Management Interface
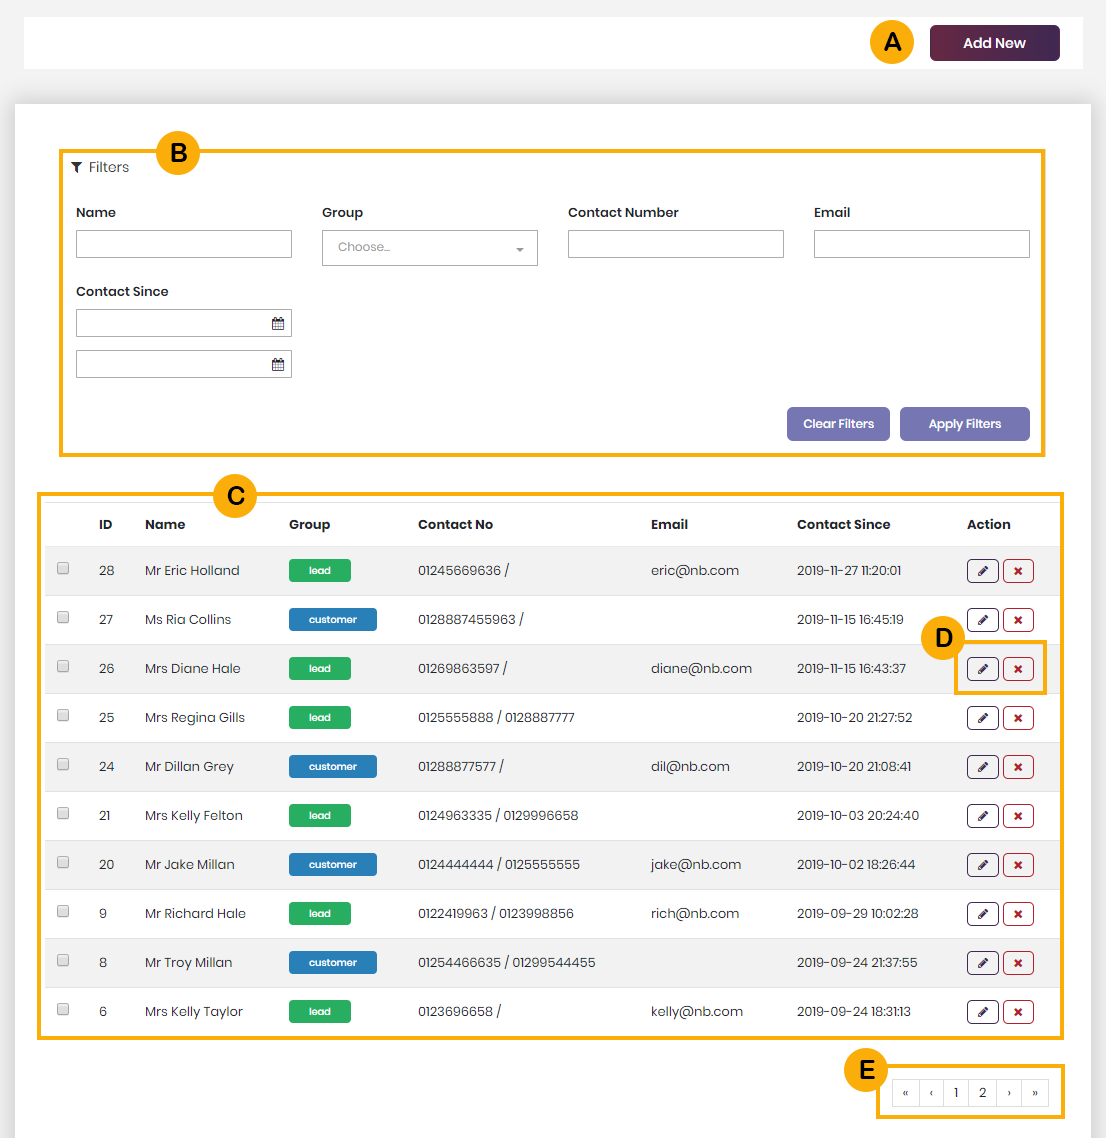
Customer management interface is where the user records and manages all customer related data. It consists of components and actions mentioned below.
- A Add New The button that commands to add a new contact
- B Filters Filter form to filter out data
- C Contacts List of all contacts in the system
- D Update, Delete actions Command buttons that can update and delete a contact
- E Pagination Navigation through the contact list

Create Contact
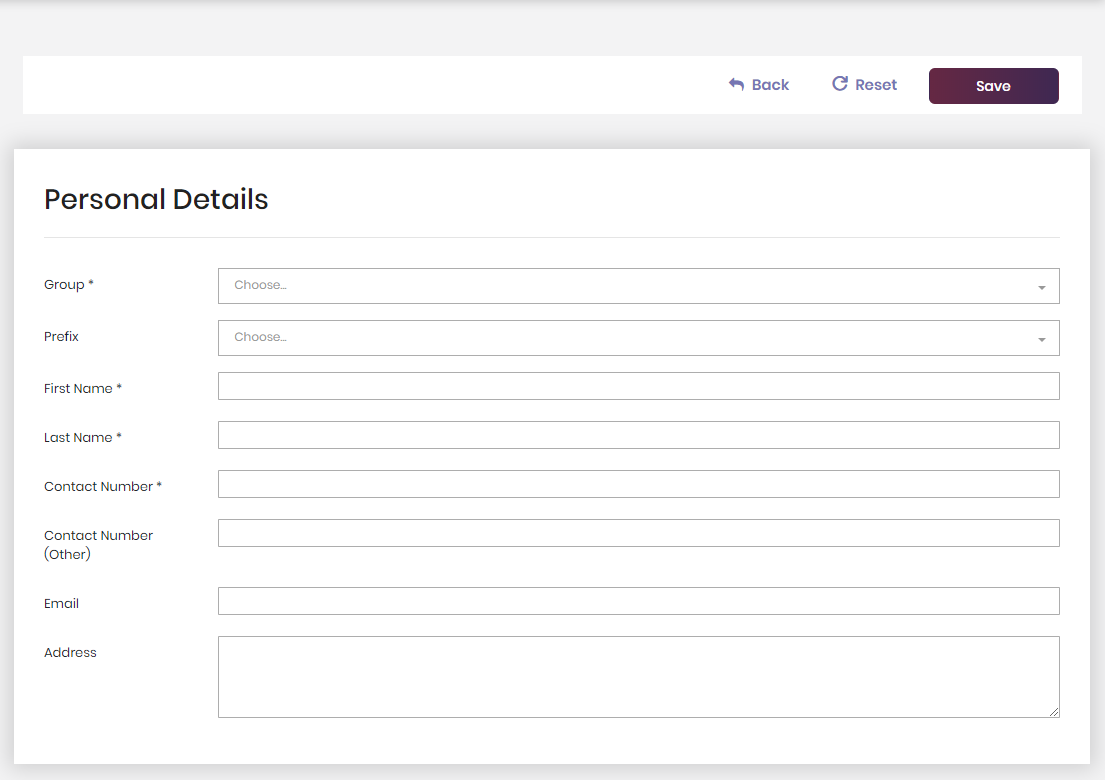
- Begin by navigating to Customers > Add Contact or go to Customers > All Contacts and click the Add New button.
Both actions will direct you to the new contact form interface. - Fill the form and click Save button. (Fields marked by * are required)
Upon the form submission user will be redirected back to the customer list interface with a success message. If the form fields are found with incorrect values, error messages will be displayed at the relevant field, stating its fault.

Update Contact
- Navigate to Customers > All Contacts
- Click the Edit button. Update contact form will be loaded with the populated data
- Modify the data as necessary and click Save button
If the data is error free, the you will be redirected to the contact list interface with a success message.
Delete Contact
- Navigate to Customers > All Contacts
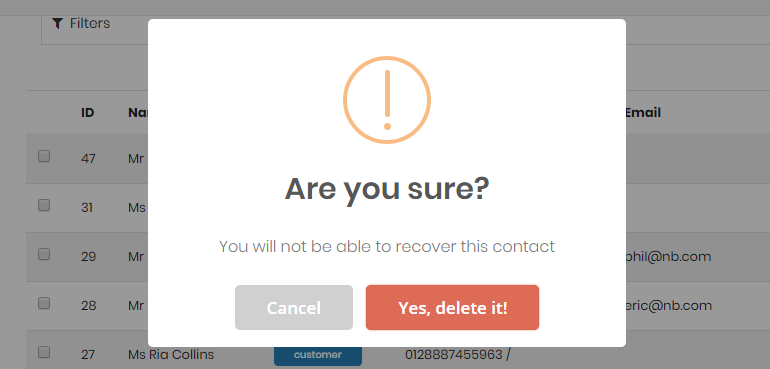
- Click the Delete button. A popup requesting confirmation of the delete action will be prompted
- Click the Yes, Delete it! button to confirm your action
Upon successful deletion, the page will be refreshed and a success message will be displayed.

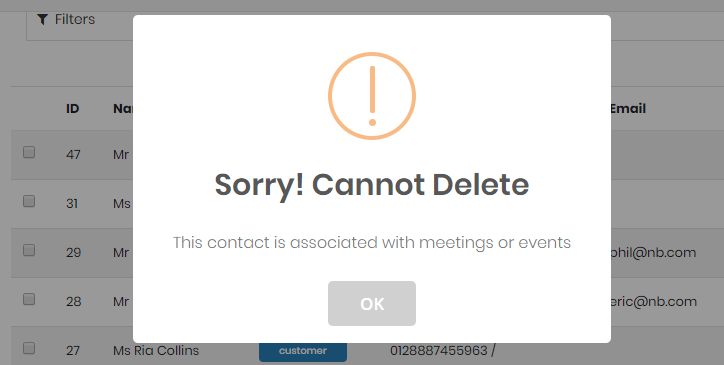
If the contact is associated with any meeting or an event, deletion action is restricted and the user is notified via a prompted popup notification.
